I use Notion almost everyday for writing as a freelancer. Literally every first draft is written in Notion before I move it to whatever form my client has requested for delivery (I’m writing this in Notion in real-time).
I’ve been doing this for probably two years now and have created an extremely productive and organised Notion setup that works not just for writing, but project management and content scheduling.
Now, Notion has become my go-to software for all things freelance, and in this post I’m sharing not just why but how I use Notion as a freelance writer. Keep reading to learn:
- What is Notion?
- Notion for beginners: How it works
- How to use Notion for writing
- Is Notion worth your money as a freelance writer?
- Next steps for becoming a paid freelance writer
What is Notion?
Notion is a writing, project management, and database platform all rolled into one digital workspace. When you first make an account, Notion looks pretty overwhelming and, to be transparent, it isn’t the easiest to get to grips with. There’s a bit of a learning curve, and you definitely have to be ready to spend a few hours learning the Notion ecosystem.

Once you do start to understand how the platform works, however, you’ll find it is one of the most intuitive and satisfying apps around.
Essentially, using Notion is like using all of the Google Workspace apps at the same time, in one place. You can use it for simple things like writing documents (pages) or to-do lists, as well as for more complex tasks like distributed team task management, CRM, and even creating web pages.
Why I like Notion more than Google Docs for writing
Speaking of the Google Workspace, I want to touch on why I transitioned from writing in Google Docs to Notion. For context, I’m a freelance content writer who works with multiple clients at any one time, most of which ask for content delivery in Google Docs form…however, I still write the first draft in Notion.
Here’s why:
- Organisation: I can keep all of my documents in one place
- Task tracking: I use Notion for deadlines, to-do lists, and project management
- Intuitive working: Notion lets me easily switch between writing, tables, and headings using shortcuts
- Aesthetics: I just prefer how Notion looks compared to Google Docs (plus there’s a dark mode)
Read More:

How I Became a Content Writer (a step-by-step guide)
Your guide to become a freelance content writer including networking, building a portfolio, and landing your first paying client.
Notion for beginners: How it works
As I said, the Notion learning curve definitely exists. I love using Notion for writing as a freelancer, and I want you to as well…but there are a few things you need to get your head around first.
To put it simply, when you make a Notion account, you’ll create a workspace (like a Google Drive) in which you’ll add pages (like Google Docs), which are filled with content blocks (text, headings, tables, databases, to-do lists, etc). I promise this sounds a lot more complicated than it actually is.
Here’s how Notion works:
Workspaces
A workspace is a personal or shared Notion space where you can make pages and work. Think of it like a Google Drive, Dropbox account, or even a digital filing cabinet.
You can add others to the entire workspace (meaning they can access everything within it) as either a workspace owner with edit control or a member who can see everything but can’t make any changes or additions.
On the left-hand side of your workspace will be the navigation bar, and the main space is referred to as the ‘editor’. This is where you’ll see and edit pages.
Pages
Each page is like a file within your digital cabinet (or a single Google Doc). You can create a new one by clicking the plus button in the navigation bar, or simply typing ‘/page’ in the editor. Hit Enter, then click on the page to open it.
At the top of the page is a title space where you can add a name. In a page’s simplest use, you can just start typing in the main section. If all you want to use Notion for is to write…then this is all you need!
You can also embed new pages within pages by (you guessed it) typing ‘/page’ and pressing Enter. If you want to link to another already existing page, type ‘/linktopage’ and a list of pages will appear. Click the one you want to link to and it’ll appear on the page.
Content blocks
Content blocks in Notion are the things that can fill each page. They can be easily dragged around and rearranged on the page vertically or horizontally with columns to personalise your page exactly how you want it.
The simplest block is the text block – straight typing in normal text and paragraphs – but there are so, so many others worth your attention. To help you understand the context of content blocks, if you were to write a page of text in pages, each paragraph is essentially its own block.
You can drag and move each individual paragraph around using the six dots to the left of the first word, as well as format the entire block by clicking those same six dots.
The next block you’ll probably come across is headings. This is perfect for SEO as Notion automatically turns your title into h1, then has h2 and h3 heading presets ready to use. Just type ‘/h2’ or ‘/h3’ and Enter to create a new heading.
This is how I mostly write using Notion: I make a new page, name it, then write using the text and headings content blocks.
Other useful blocks to know about are image blocks, table blocks, and bullet list blocks, but to see all your options, just type / for a list to appear. Scroll the list and click whichever block you want to use.
Read More:

Crafting the Perfect Blog Post Outline to Boost Your SEO Strategy
Learn my easy blog outline template to improve your SEO.
How to use Notion for writing
Now that we’ve covered the basics, I want to get a bit more personal. One of the things I like most about Notion is how malleable it is – you can design it to look and work for your specific needs. That being said, in this post I promised to share how I use Notion for writing as a freelancer.
These are the steps you can take to set up a workspace like mine:
Step 1: Make an account
Head over to notion.so and click on ‘Get Notion Free’. You can quickly create an account using your email or existing social media/Gmail account by entering a verification code. Next, you’ll need to answer a series of questions to help set up your workspace.
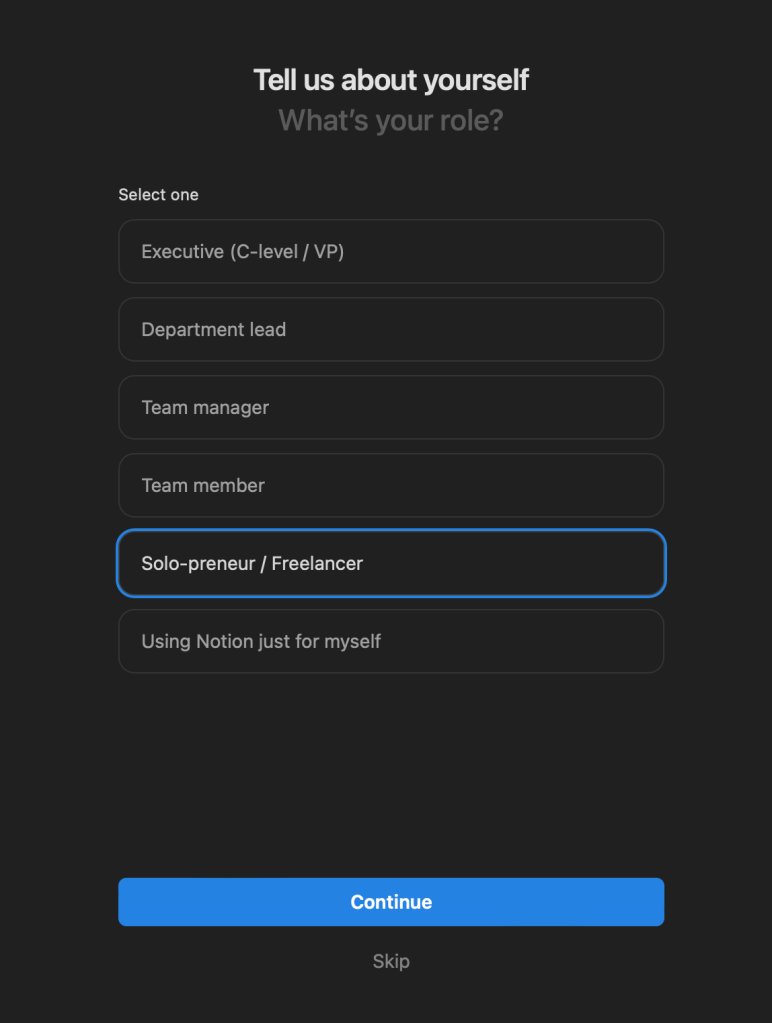
This is a great time to tell Notion that you’re a freelance creative wanting to write and project manage with the platform.
Step 2: Create a workspace
With creating an account complete, Notion will automatically bring you to your workspace. They’ll also suggest a list of different templates to get you started. The one I like is called the ‘Documents Hub’. It’s basically a table where you can add all your different pages in order to filter them by type, client, progress point, and deadline.

Navigate to the Documents Hub and hit ‘Continue’.
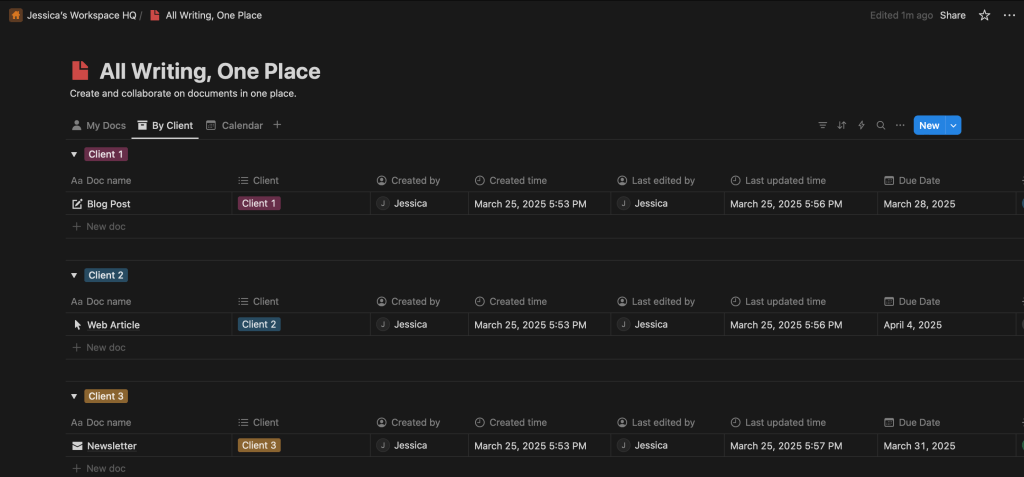
Step 3: Set up your ‘contents page’
I like to think of this page as my contents page; it’s where I keep links to all of my documents in order to keep track and easily find them later on. To change the page name, click on where it says ‘Documents Hub’ and simply type a new title (I call mine ‘All Writing, One Place’).
Different columns can have different settings, e.g. dates, status, and users. To change a column’s type, click the top cell and select ‘edit property’. A right-hand bar will appear with options, click ‘type’ and choose an option.

To set yours up exactly how I have mine, you can create the following columns.
- Document Name (text)
- Client (multi-select)
- Status (status)
- Due Date (date)
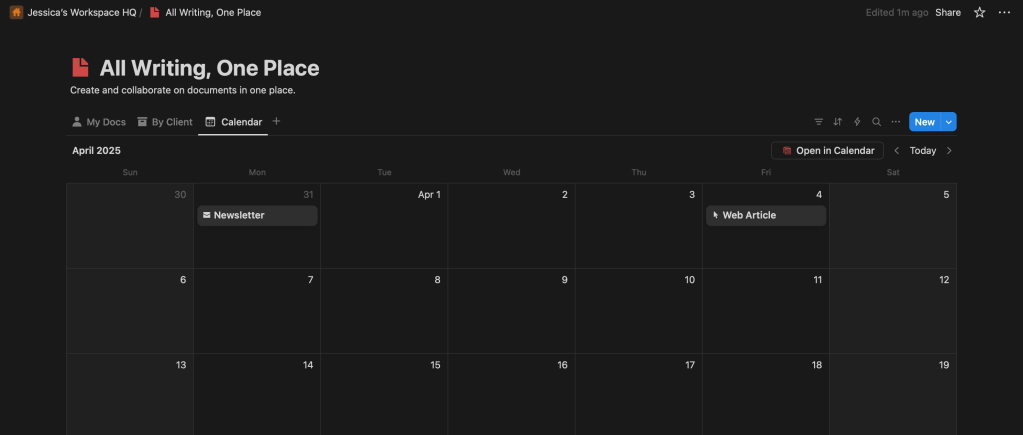
You can also add ‘views’ to be able to sort the information by different values. I have mine set up by document, client, and in a calendar view to see upcoming deadlines.
Step 4: Make a page
To create a new page for a new document, just click ‘new document’. This will create a new table entry. Technically, you can write your document directly in here, however, I prefer to add all the information, then in the main editor space, I type ‘/page’ to create a new page.
Click the page, and this is where you can start writing. As always, add a title at the top, then just start typing away.
Top Tip: To see your word count, click the three dots in the top right-hand corner of the screen and scroll to the bottom!
Is Notion worth your money as a freelance writer?
Let’s talk about price. I’ve used both Notion’s Free and Plus plans, and I want to highlight the differences:
| Feature | Notion Free | Notion Plus |
|---|---|---|
| Price | Free | $10/month |
| Pages and Blocks | Unlimited | Unlimited |
| Guest Invites | 10 | 100 |
| Charts | 1 | Unlimited |
| Page History | 7 Days | 90 Days |
| File Uploads | 5 MB | Unlimited |
Here’s the bottom line…unless you’re working with multiple clients within Notion, you don’t need the Plus plan. The free version has everything you need as a freelance writer for writing documents and individual project management.
The main reason for upgrading is if you use Notion to work with multiple clients or teammates with whom you need to share your workspace. If it’s just you using the platform, then there’s no need to shell out any extra cash.
Tldr: Notion for writers is 100% free.
Next steps for becoming a paid freelance writer
Notion is one of so many tools you can use to help you with your freelance writing career, and this blog is another! To receive these freelance writing guides straight to your inbox, input your email into the box below.


Leave a comment